Blackboard Collaborate Ultra can be used to record lectures.
Pros:
- The recording is saved in the cloud as you make it, so you do not have to save and upload large movie files.
- Recordings can be made with or without a live audience. (See UW-Madison Recording Policy.)
Cons:
- The recording could be affected by the quality of your Internet connection.
- No video editing features are provided, not even simple trimming. However, you could download the movie file and manipulate it.
- It would be difficult to make legible handwriting with a mouse using the built-in drawing tools. A graphics tablet or ipad could be used if available. Or you could write on paper or a whiteboard visible via your webcam.
High Level Steps
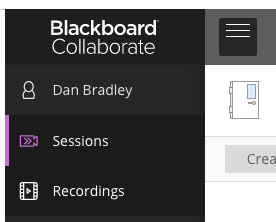
- Join the Blackboard Collaborate Ultra session named Course Room.
- Lock the room if you don’t want people wandering in during the recording session.
- Upload and share the presentation slides or share an application window.
- Unmute the mic in Blackboard.
- Start recording.
- Give the presentation.
- Stop recording.
- Publish the URL of the recording.
Recommendations
- Record in short chunks. For example, a 60 minute lecture could be published in 6 parts.
Detailed Steps
- Click on Blackboard Collaborate Ultra in your Canvas course page
- Click on the session named Course Room.
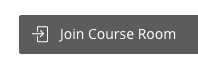
- Click on Join Course Room. If there is no Join button, check to see if there is a link named “Unlock course room” near the top of the Course Room panel and click on it. Then click Join Course Room.
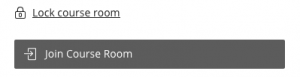
- If you do not want anyone else to be able to join the session while you are recording, lock the session named Course Room. To do that, go back to the tab showing Blackboard sessions and click on Lock Course Room near the top of the panel on the right showing Course Room Session options.
- Respond to any prompts from your browser to allow access to your microphone and camera.
- Expand the panel on the right by clicking the purple tab in the lower right.

- Click on the Share Content button in the bottom row of the panel on the right.

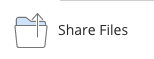
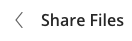
- If your presentation is a PDF or simple PowerPoint, click Share Files to upload the presentation.
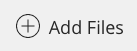
- Click Add Files and choose the presentation file.
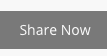
- After the file has finished being uploaded, select the file by clicking on it in the Main Room Files list and then click the Share Now button near the bottom of the panel.
- Select a slide under “Select a slide to begin sharing”.
- The selected slide will appear in the main area of the Blackboard window.
- Click Add Files and choose the presentation file.
- Before beginning the recording, unmute your microphone by clicking on the microphone button near the bottom of the window.

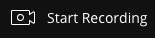
- Start recording by expanding the session menu tab in the upper left of the window. Click on Start Recording.

- Use the left and right arrow buttons under the slide in the main window to switch slides.


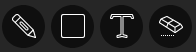
- The position of your mouse pointer is not recorded by default. To record it, click on the hand tool.

- Use the pencil and shape tools to draw on the slide. These annotations are cleared when switching slides.
- During the presentation, you can share some other file or window on your computer (i.e. Mathematica, an ipad screen, or a browser window playing a lecture demo movie). To do so:
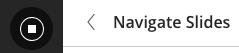
- Get out of the slide navigator by clicking on the stop sharing button or the back button near Navigate Slides.
- Share some other file if desired, or click on the back button next to Share Files
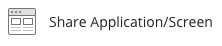
- Click Share Application/Screen.
- Respond to any prompts from your browser to allow access to the desired window.
- Get out of the slide navigator by clicking on the stop sharing button or the back button near Navigate Slides.
- During the presentation, you can switch to the view provided by your webcam. To do so:
- Enable your webcam by clicking the webcam button.

- Click the Stop Sharing button.

- Enable your webcam by clicking the webcam button.
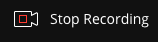
- When finished with the recording, expand the session menu tab in the upper left of the window. Click on Stop Recording.
- It will take some time before the recording becomes available for viewing. An hour-long recording could take several hours if the system is really busy. To access the recording, go back to the tab containing your Canvas course and click on Blackboard Collaborate Ultra. This will open the Sessions screen, which is not what you want. To get to the recordings screen, expand the Blackboard menu by clicking on the menu button in the left of the top bar in the Blackboard area. Click on Recordings.
- If the recording that you just made does not appear, wait and then click on Blackboard Collaborate Ultra again to refresh the view. Repeat the previous step.
- Once the recording becomes available, you can rename it by clicking on its … button and then clicking Edit name.

- Although students could watch the video as is, it is nicer to put a link to the video in your Canvas page. To do that:
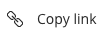
- Click on the recording’s … button and then click “Copy link”.
- Go to your Canvas page and click Edit. (If you do not already have a Canvas page, create one and make it the front page, or add it to a module.)
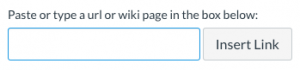
- In the edit window, add some text describing the recording, highlight the text, click the link button, and paste in the URL of the recording that you previously copied.

- Click on the recording’s … button and then click “Copy link”.
- If you would like to download the video file or allow students to do so, enable downloading in the Blackboard session settings:
- Go to a browser tab containing your Canvas course.
- Go to Blackboard Collaborate Ultra.
- Click on the session you used to make the recording (e.g. Course Room).
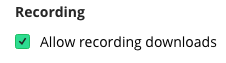
- In the session settings panel on the right, check the “Allow recording downloads” checkbox if it is not already checked.
- Click Save.
Controlling Access
The recordings in Blackboard are accessible to anyone with the URL of the recording. The recording could get published more broadly than you intend if somebody makes the URL public. However, even if access to the URL were restricted, those who do have access to the URL could make a copy of the content by doing a streaming screen+audio capture while watching it on their device, and they could publish that copy. So ultimately, we can’t absolutely prevent it from leaking out.
Here are some options for making it less convenient for people to broadly share the video:
- You can delete the recording from Blackboard when you no longer want it there.
- You can control whether viewers are offered the option to download the recording. To do that, go into the session settings and click the checkbox to allow/disallow downloads. It is disallowed by default. Note that just because downloads are disallowed doesn’t mean people can’t make a copy of it by doing a streaming screen/audio capture.